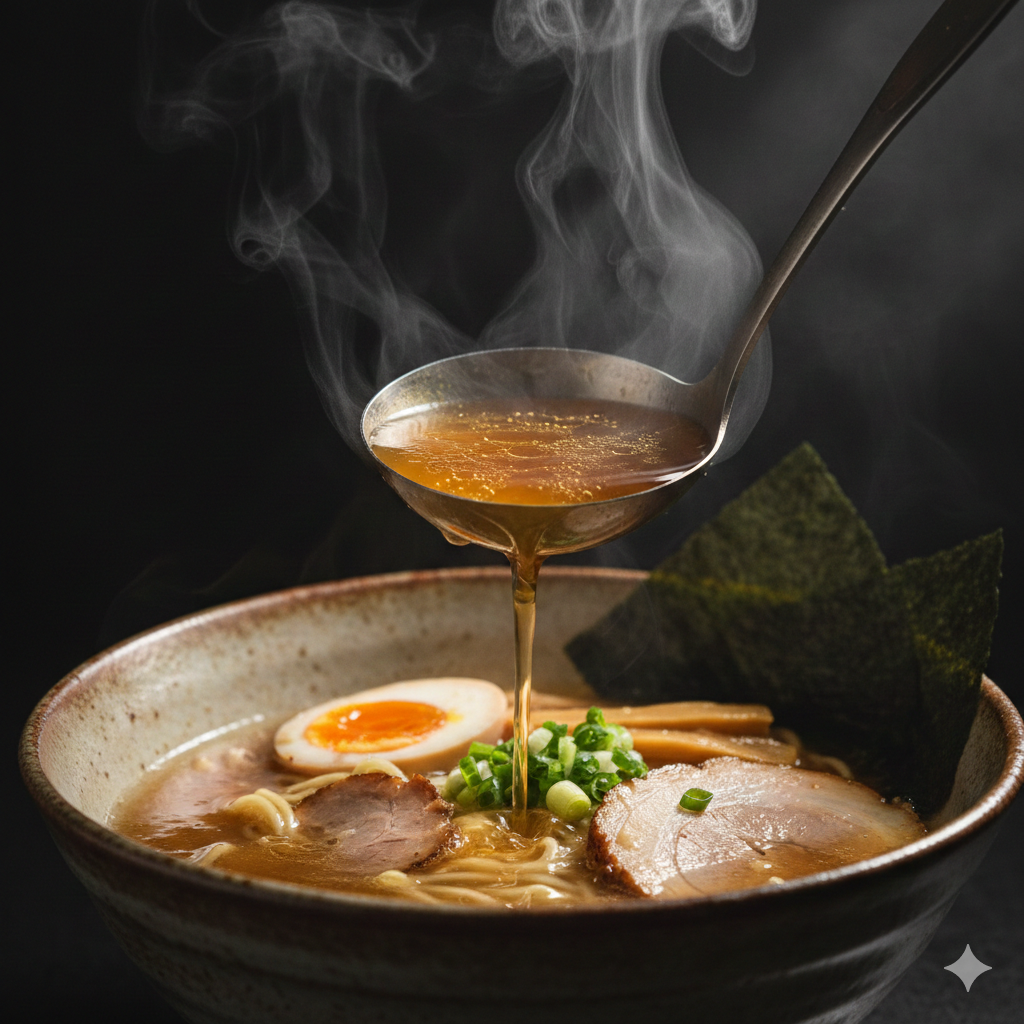
Ramen is more than just a meal; it is a complex, multi-layered experience where the broth serves as the undisputed soul of the bowl. While many home cooks are intimidated by the perceived complexity of authentic Japanese ramen, creating restaurant-quality broth at home is not only possible but deeply rewarding.
This comprehensive guide synthesizes the secrets of top-tier ramen chefs and traditional home cooking methods to provide you with the most definitive resource on the web. Whether you crave the collagen-rich silkiness of a Tonkotsu, the refined elegance of a Chicken Chintan, or a versatile Hybrid Broth, this article covers every technical detail.
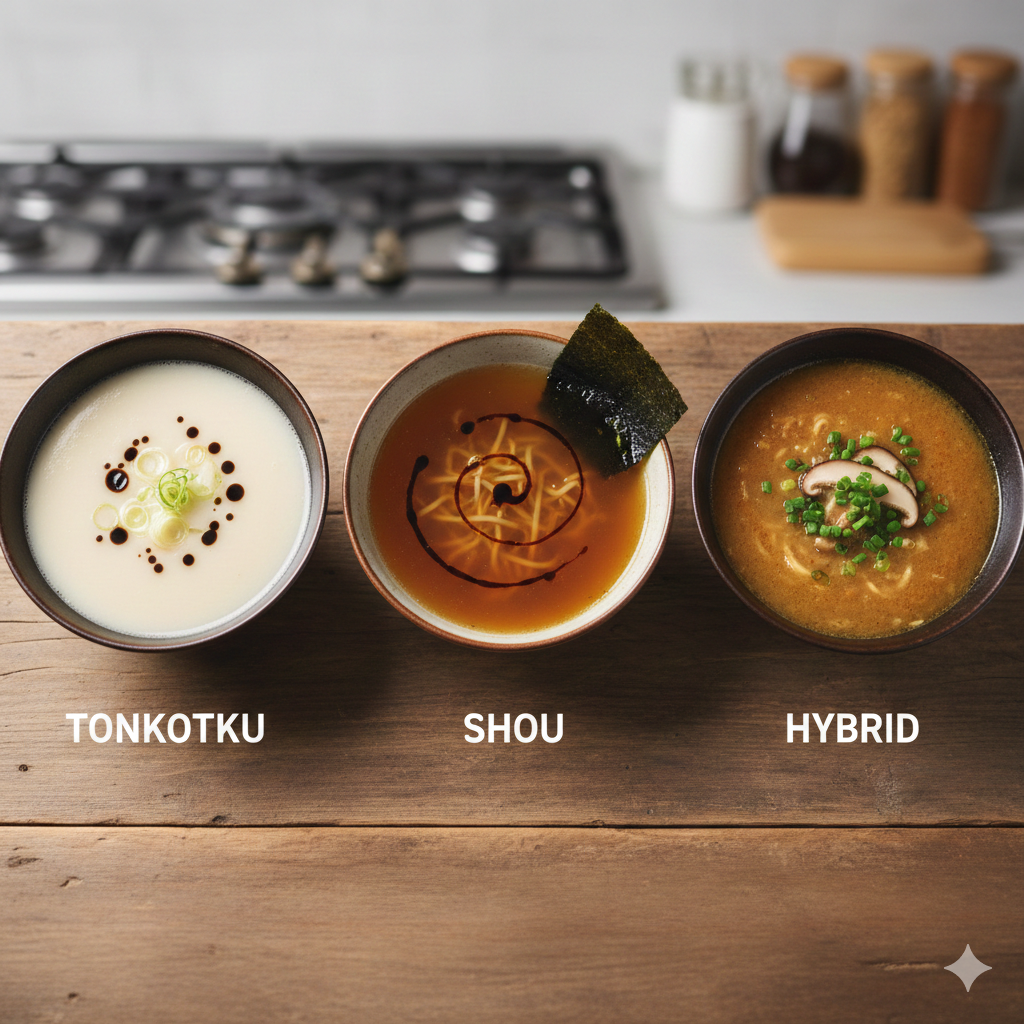
Part 1: Understanding the Three Pillars of Ramen Broth
Before you light the stove, you must choose your path. Ramen broths are generally categorized by their ingredients and their clarity.
1. Tonkotsu (The Rich & Creamy Heavyweight)
Tonkotsu is a labor of love made from pork bones, specifically those high in collagen like pig trotters and neck bones. Through a process of high-heat boiling and long-term simmering (often 10–14+ hours), the fat and collagen emulsify into a creamy, opaque white milk.
2. Chintan (The Clear & Elegant Classic)
A Chintan (clear soup) is typically made from chicken carcasses and wings. The secret here is a gentle simmer—never a boil—to ensure the proteins don’t agitate the liquid, keeping it as clear as consommé but packed with deep umami flavor.
3. The Hybrid “Mochi-Mochi” Broth
For those who want a balance of depth and speed, a hybrid broth combines pork bones and chicken carcasses. This “best of both worlds” approach provides a hint of tonkotsu richness without the 12-hour commitment, often taking just 3–5 hours.
Part 2: The Science of Umami — Essential Ingredients
The complexity of a ramen broth comes from the synergistic effect of glutamic acid (from meat and kombu) and inosinic acid (from bonito and meat).
The Bone Selection
- Pig Trotters (Pork Feet): Split lengthwise, these are the primary source of the “sticky” collagen that creates a creamy mouthfeel.
- Chicken Carcasses: High in glutamic acid, providing the fundamental savory base.
- Chicken Wings (or Feet): A more accessible substitute for chicken feet (Momiji), adding sweetness and richness without making the broth cloudy.
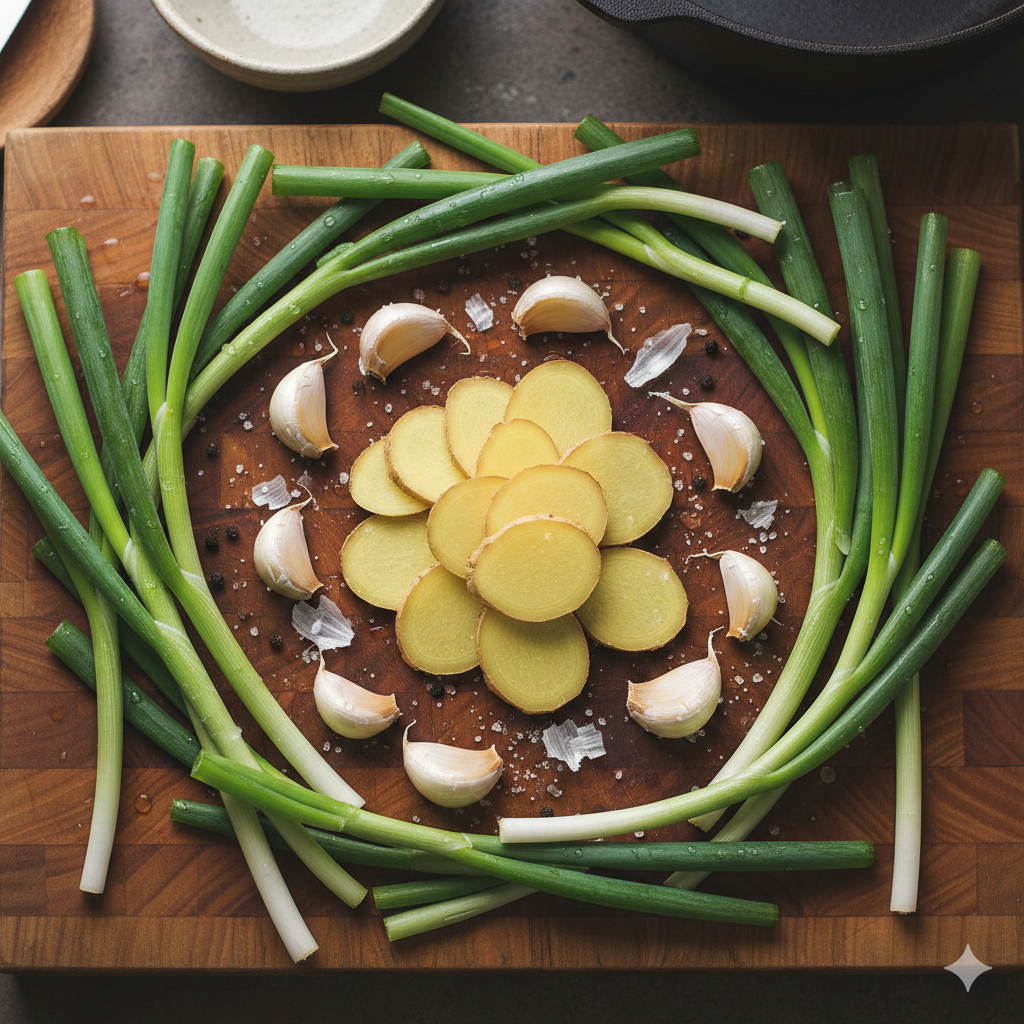
The Aromatics & Sweeteners
- Ginger & Garlic: Essential for concealing the “gamey” odor of the bones.
- Scallions & Leeks: Use the white and light green parts to add subtle sweetness.
- Whole Onions (Skin On): Adding a whole onion (with skin for color) contributes natural sugars that balance the saltiness of the final bowl.
- Mushrooms (Cremini or Dried Shiitake): These provide a massive boost of guanylic acid, another layer of umami.
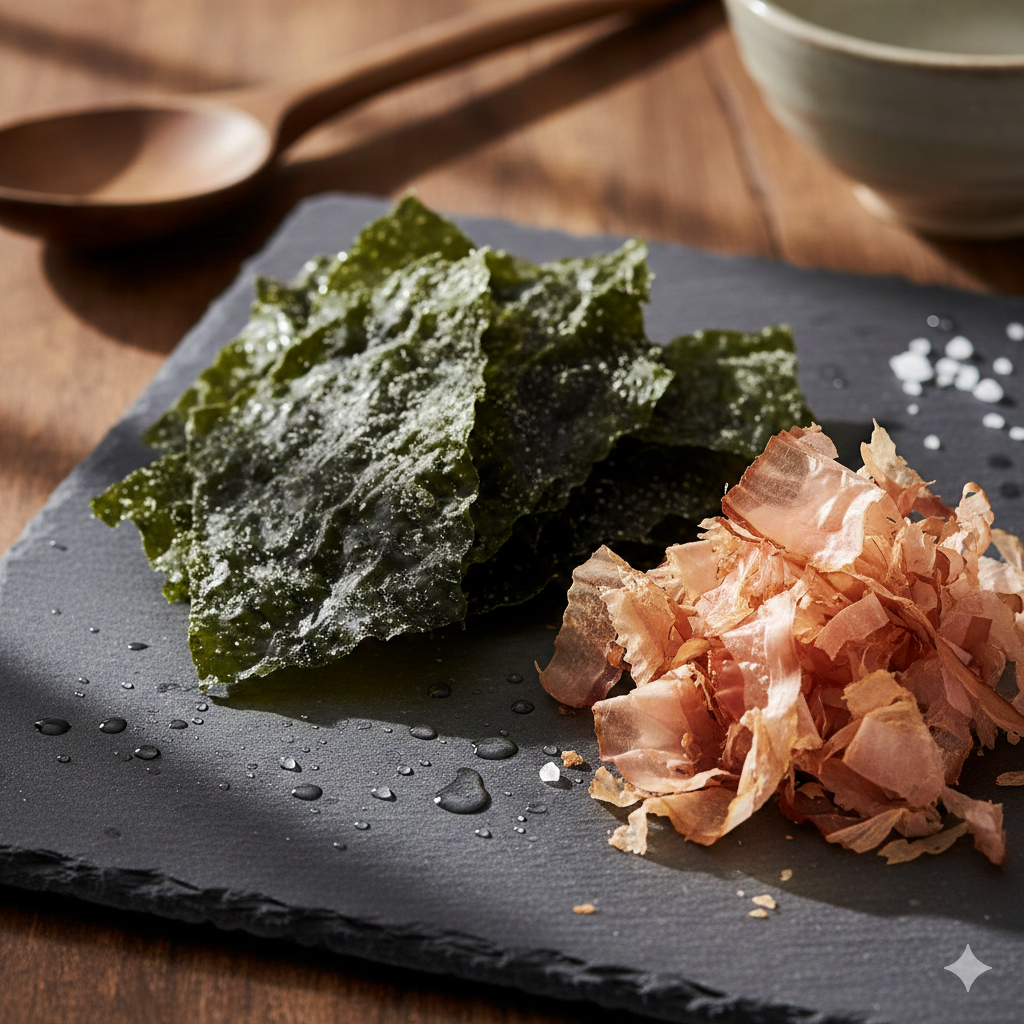
The Dashi Element
To elevate a broth from “good” to “extraordinary,” many chefs add a Japanese Dashi stock. This is made from:
- Kombu (Dried Kelp): The world’s richest source of glutamic acid.
- Katsuobushi (Bonito Flakes): Smoked and fermented tuna flakes that add a smoky, savory depth.
Part 3: The Master Technique — A Step-by-Step Guide
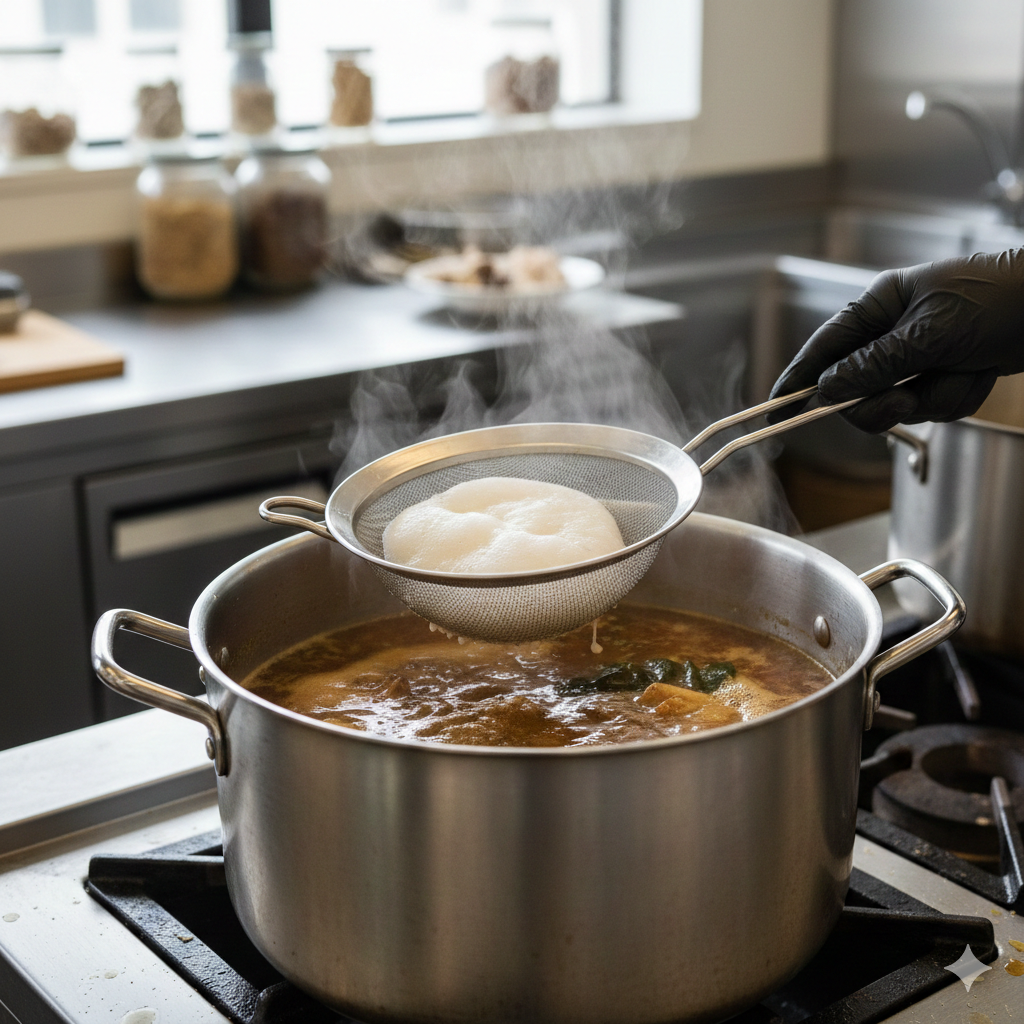
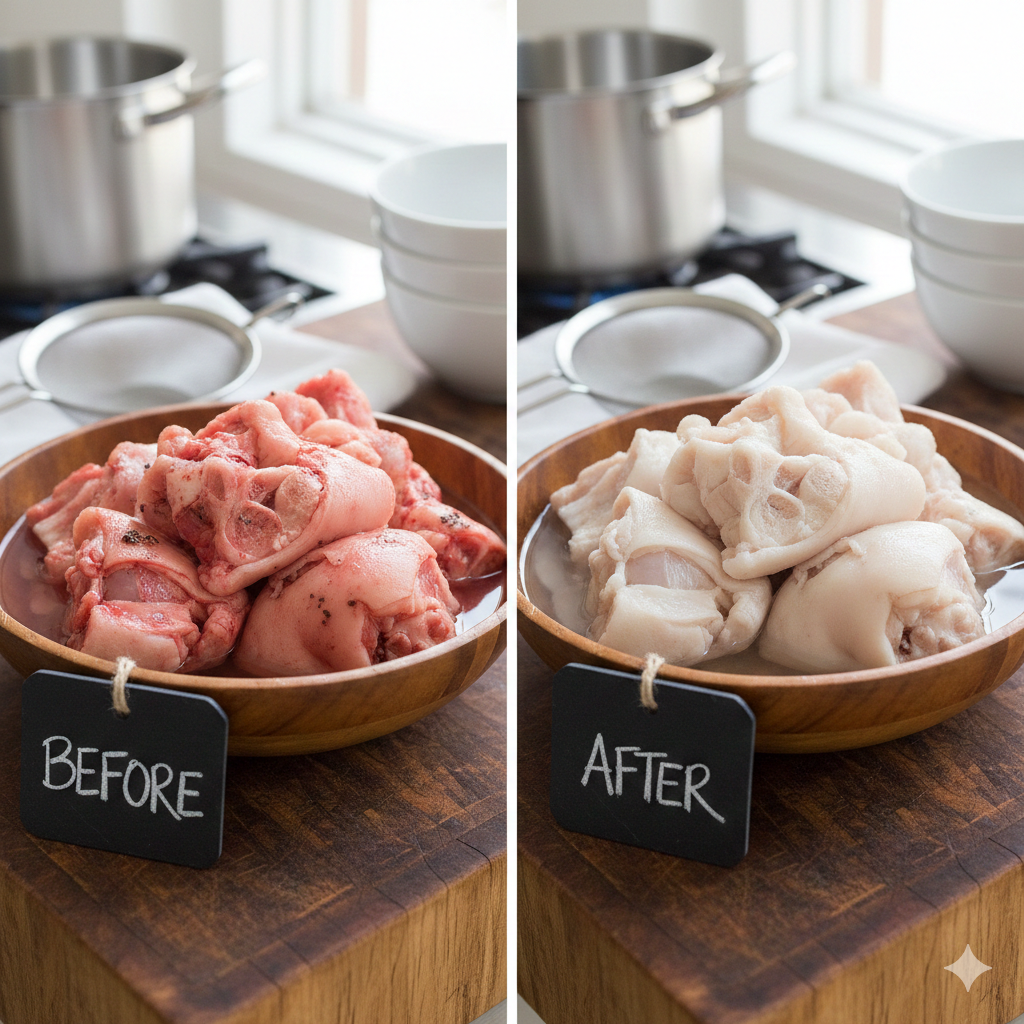
Step 1: The Blanch and Clean (Non-Negotiable)
To achieve a clean flavor, you must remove “coagulated blood” and unwanted substances.
- Place bones in a pot, cover with cold water, and bring to a boil for about 30 seconds to a few minutes until they turn white.
- Drain the water and scrub the bones under cold running water, removing any brown bits or organs.
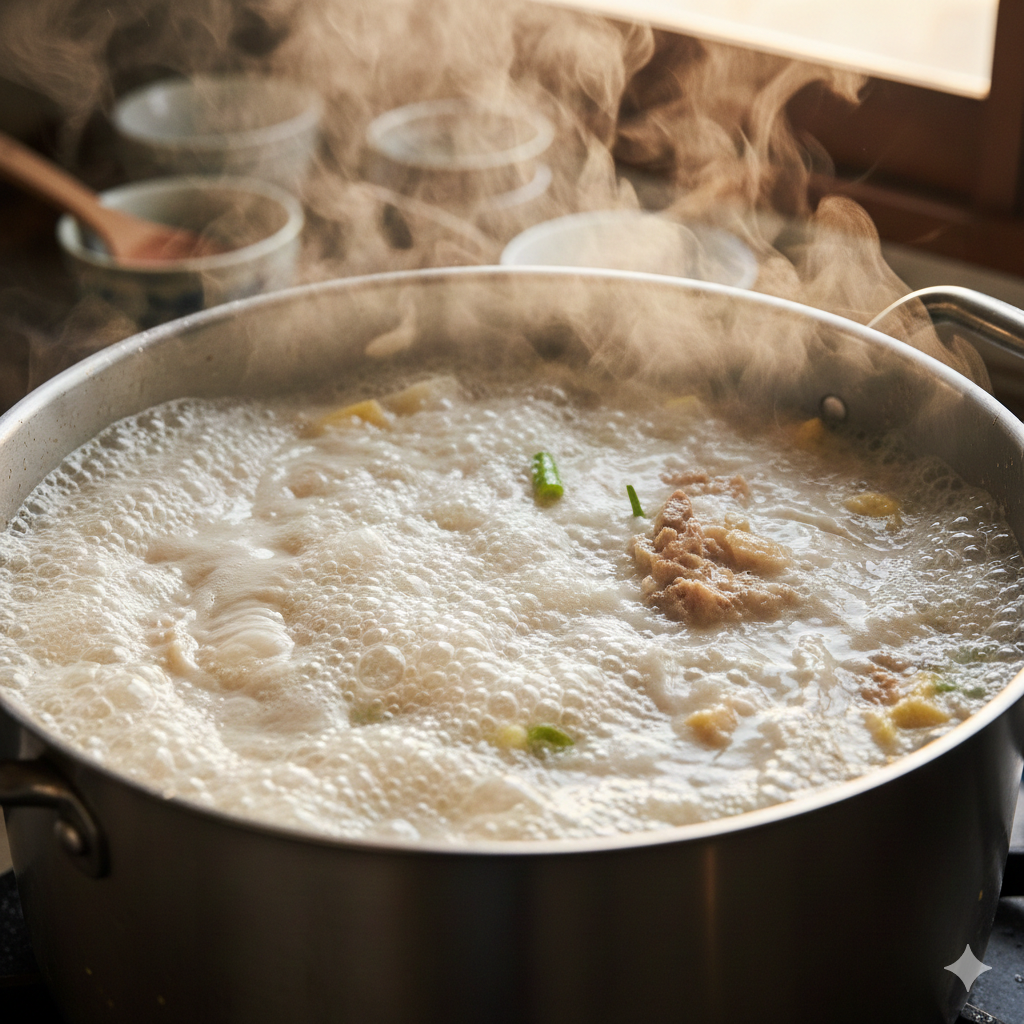
Step 2: The Long Simmer
- For Clear Broth: Add cleaned bones and cold water to a clean pot. Bring to a bare simmer. Skim any “scum” (white foam) that rises to the top. Keep the heat low; if the ingredients move too much, the soup will become cloudy.
- For Creamy Tonkotsu: Bring to a vigorous boil and maintain it. Use a heavy, tight-fitting lid to keep the heat in.
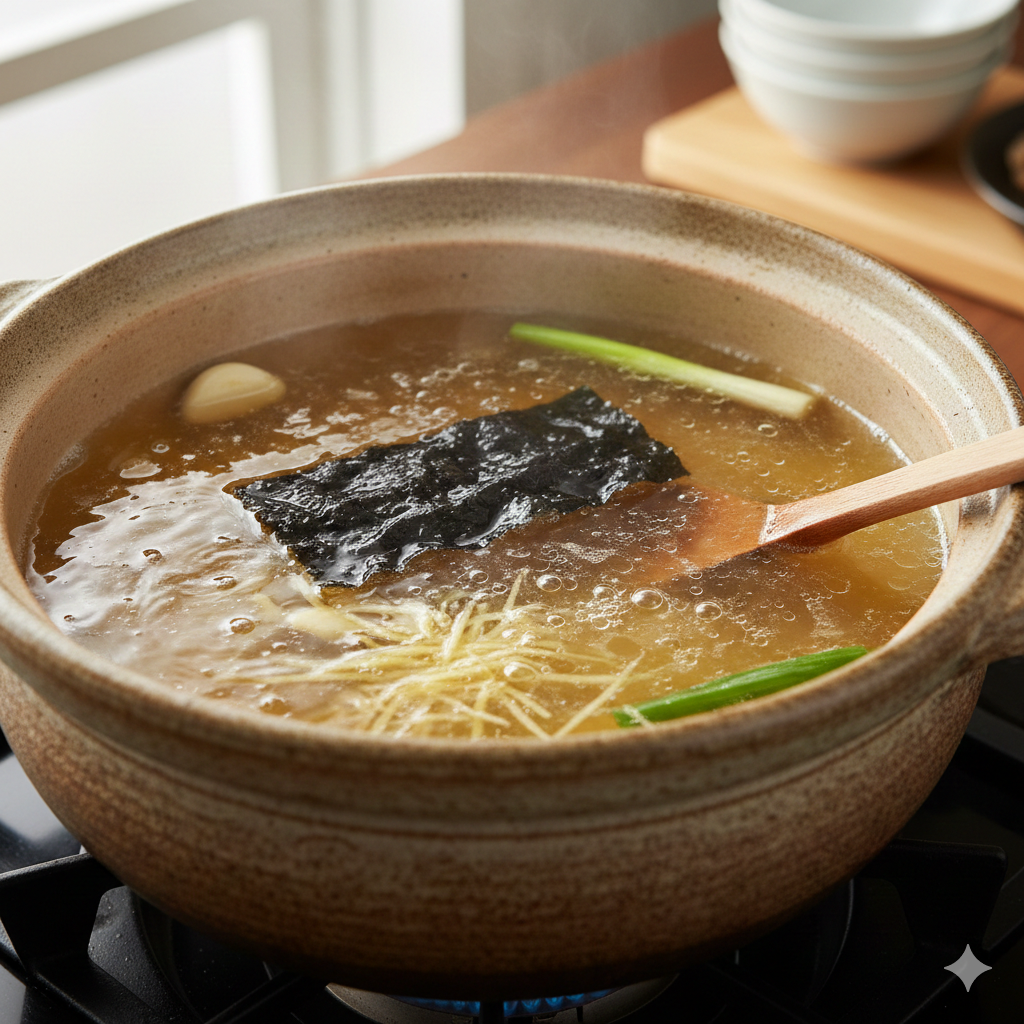
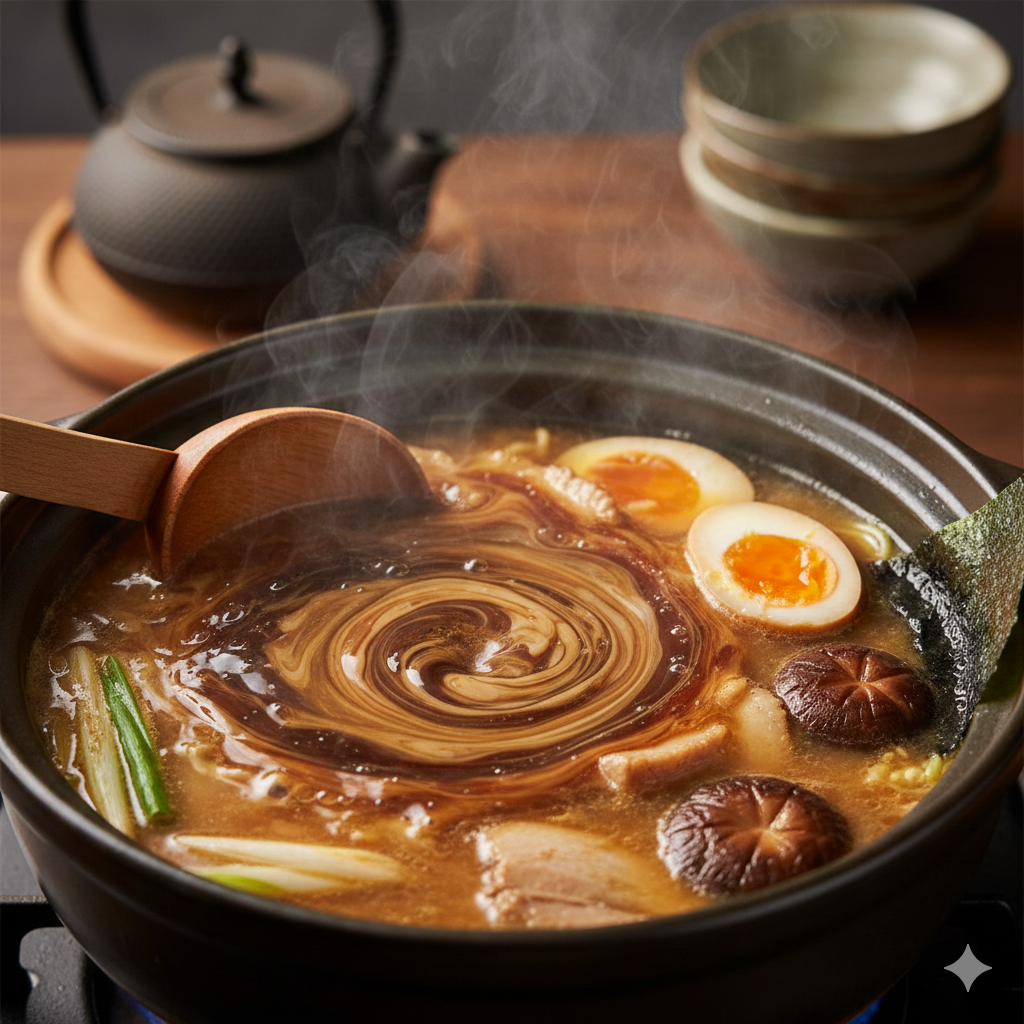
Step 3: The Aromatic Infusion
Add your vegetables (onion, garlic, ginger, etc.) during the last 2–3 hours of cooking. Adding them too early can lead to them disintegrating and making the broth bitter.
Step 4: The Dashi Finish
For hybrid or chicken broths, add your bonito flakes or overnight dashi stock toward the very end. Simmer for only a few minutes to extract the flavor without the bitterness.+2
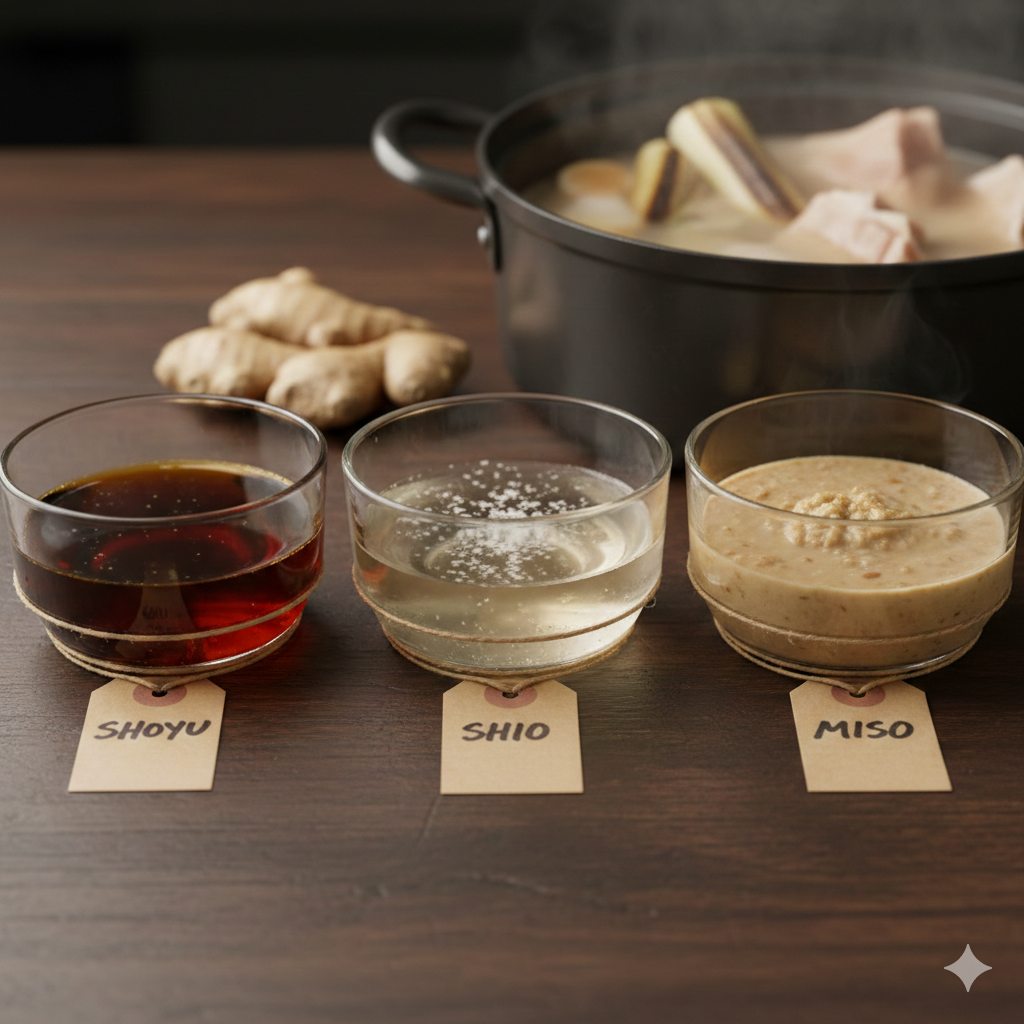
Part 4: The Secret Weapon — Mastering the “Tare” (Seasoning)
A common mistake for beginners is tasting the broth and finding it “flavorless” or “watery”. This is because the broth is unsalted; the flavor comes from the Tare (tah-ray), a concentrated seasoning base placed in the bottom of the bowl.
| Tare Type | Base Ingredients | Profile |
| Shoyu (Soy) | Soy sauce infused with kombu, mirin, and often leftover chashu liquid. | Deep, savory, and classic. |
| Shio (Salt) | Salt, dashi, sake, and mirin. | Light, allows the broth flavor to shine. |
| Miso | Fermented soybean paste, peanut butter (for creaminess), ginger, and chili oil. | Rich, nutty, and robust. |
Part 5: Modern Methods — Instant Pot vs. Slow Cooker
If you don’t have 12 hours to babysit a stove, modern technology can help:
- Slow Cooker: Set to low for 10 hours or high for 6. This produces an exceptionally clear broth with very little effort.
- Pressure Cooker / Instant Pot: Drastically reduces time (often to 2–3 hours) but can produce a slightly cloudier broth than the slow cooker.
Part 6: Troubleshooting & Professional Tips
“My broth has no flavor!”
Check if you added salt. Authentic ramen broth is never salted during the boiling process. The saltiness must come from the tare.
“My Tonkotsu isn’t white/creamy.”
You likely didn’t boil it hard enough. The “whiteness” is an emulsion of fat and water. You can fix this by finely chopping cooked pork fatback and whisking it into the finished broth.
“The soup tastes gamey.”
This is often caused by putting a lid on the pot during the initial simmer or not cleaning the bones thoroughly enough. Always leave the lid slightly ajar or off to allow gamey odors to escape.
To beat any restaurant, your toppings must be as considered as your broth.
- Ajitsuke Tamago (Ramen Egg): A soft-boiled egg marinated in soy sauce and mirin.
- Chashu Pork: Melt-in-your-mouth braised pork belly.
- The Noodles: Choose thin, straight noodles for Tonkotsu and wavy noodles for Shoyu or Miso to better “grab” the broth.
Part 8: Storing Your Liquid Gold
Making ramen broth is an investment. Don’t let it go to waste:
- Fridge: Keeps for 2–3 days.
- Freezer: Divide into single-serving portions (approx. 2 cups/500ml) in Ziploc bags. It will keep for up to one month.
Final Verdict
By mastering the blanching technique, understanding the umami synergy of dashi and bones, and never skipping the tare, you can create a bowl of ramen that rivals the best shops in Tokyo. Start your broth today—your kitchen will never smell the same again.